 Essevin Resources
CC Switch
Create a Essevin key, import it into CC Switch, and use the provider in Codex App, Codex CLI, or Claude Code.
CC Switch is a desktop configuration manager for Windows, macOS, and Linux. Use it when you prefer a graphical setup or regularly switch Claude Code and Codex providers. It manages configuration; it does not install Codex App, Node.js, or either CLI.
Prefer a screenshot-by-screenshot guide?
Download the free bilingual CC Switch beginner guide (PDF). It preserves the original visual walkthrough from key creation through Claude Code or Codex activation.
Only follow this guide for development tools
To make product images in the browser, skip API-key setup and use Creative Studio.
The complete path
Create a Essevin key → Import CCS → Choose Claude Code or Codex CLI → Confirm in CC Switch → Enable
Before you start
Choose the key by model
Prepare the target client first: Codex App, Codex CLI, or Claude Code.
Choose the key by model: Claude uses a Claude-group key, and GPT uses an OpenAI / Codex-group key.
Update CC Switch: use the latest release.
Install CC Switch
Download the current .dmg from CC Switch Releases. Install and open the app once so your browser can launch it during import.
Import from the Essevin console
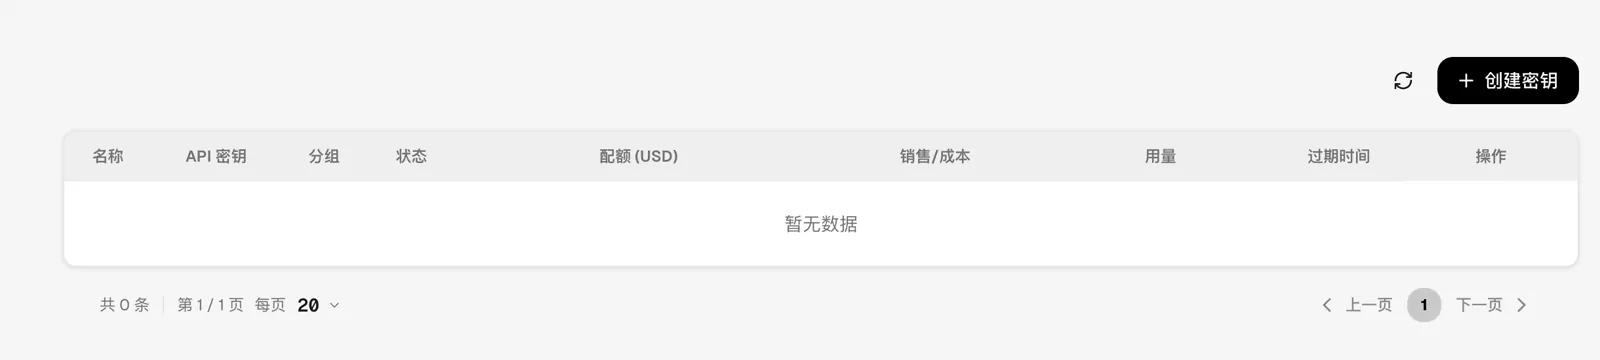
Open Key Management
Open Key Management and select Create key in the upper-right corner.
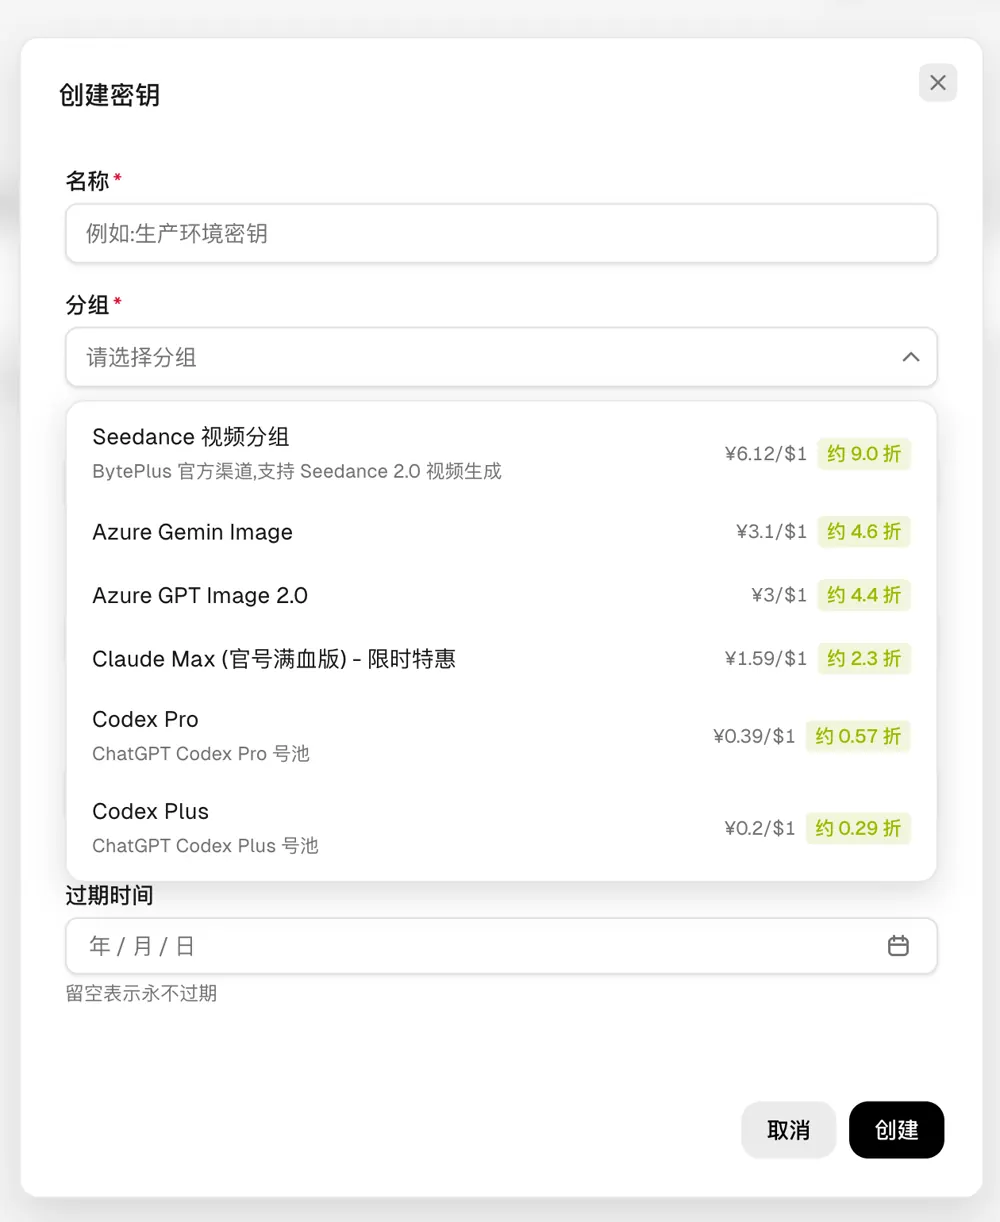
Name the key and choose a model group
Enter a recognizable name, choose the group for the models you need, and select Create. Claude uses a Claude group, and GPT uses an OpenAI / Codex group. Expiration is optional.
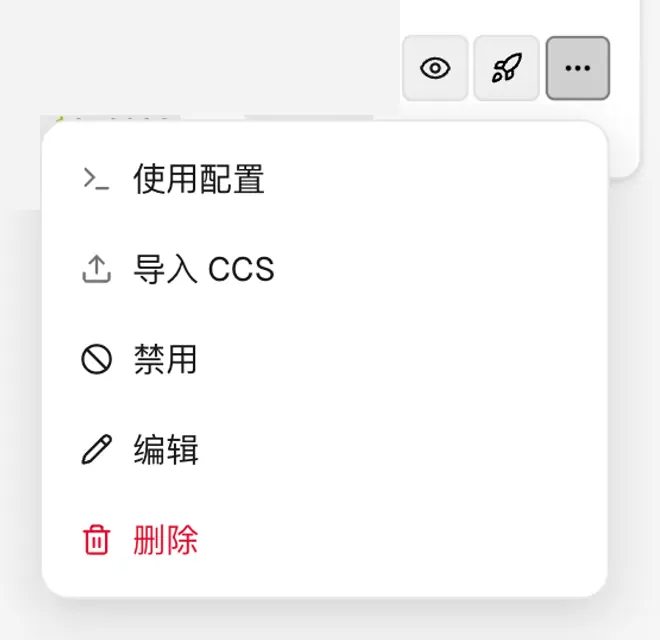
Open Import CCS
Find the new key row, open its ··· menu, and select Import CCS. You do not need to copy the key manually.
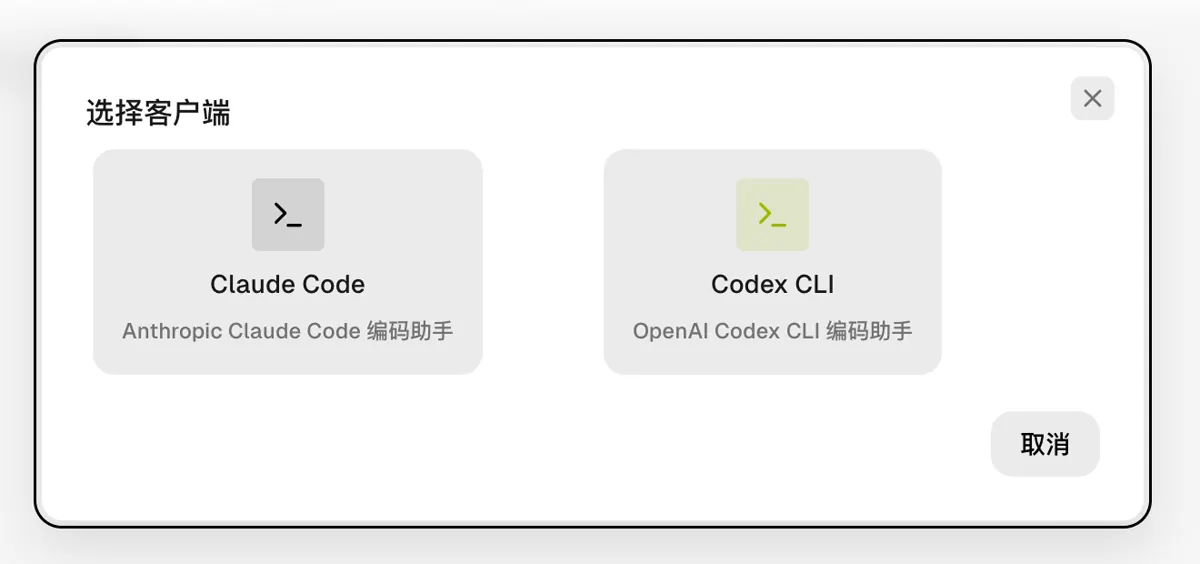
Choose the client
Choose Codex CLI for both Codex App and Codex CLI. Choose Claude Code when you use Claude Code. If you use both client families, repeat the import for each one.
Review and confirm
In the browser prompt, select Open CC Switch. Verify the provider name, Base URL, and masked key, then select Import.
Enable the provider
Open the matching Claude Code or Codex tab in CC Switch, find the imported provider, and select Enable. The provider should now appear as active.
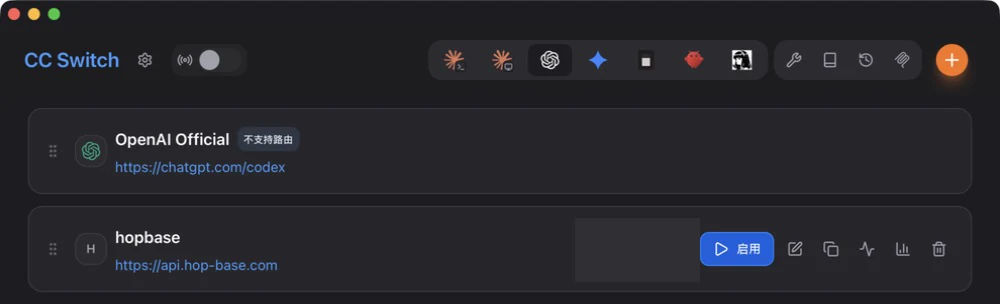
Verify in a new terminal
Run claude or codex and send a short test. For Codex App, fully quit and reopen the app before starting a test task. If an existing terminal still uses the previous provider, close it and open a new terminal.
Codex App and Codex CLI
CC Switch writes the user-level Codex provider configuration. After switching providers, fully restart Codex App or open a new Codex CLI session so it reloads the configuration.
Troubleshooting
Browser did not open CC Switch: launch it manually once, then retry Import CCS.
Provider did not change: open the matching client tab and select Enable.
Command not found or an old provider remains: install Node.js LTS and the target CLI, then use a new terminal.